Skoda Fabia 1.4
Instrument Cluster
Removal (and repair).
March 2024. This is an old page, dating from 2017, intended to assist anyone who had similar trouble and wanted to have a go at fixing it themselves. For me the difficult part was accessing the instrument cluster. Finding the fault was tedious but straghtforward. With hind sight I think I should have looked under the sticker first. If you need to go this way and read this I suggest you do! The electrical problems in the car eventually got the better of me. It would run, but I lost control of the central locking windows and mirrors. No professional I approached would help. It was beyond economic repair and went to a breaker.
Disconnect the negative battery connection. (10mm nut)
Drop down and pull out the steering wheel.
Pull the trim over top of steering column, behind the steering wheel, straight off towards steering wheel.
Remove two fixing screws at base of instrument cluster. (Torx T20)
Pull and wiggle the cluster out.
Remove connection on right. Note the purple locking device... lift and pull it right up. This lever not only disenagages the plug, it pulls it back in when the job is done.
Pull the cluster further out to access other connection. Locking tab needs to be disengaged outwards. The plug may need helping out with flat bladed screwdriver.
I took instrument cluster out in order to try and make the speedometer illuminating LEDs come back on. There are five, and, numbering from the bottom left, 2,3,4 and 5 had all stopped working without warning. I was successful!
Disassembly of the cluster unit is straight forward. The pointers are a push fit and can be levered off with a flat bladed screwdriver. Work against something like an old credit card to avoid marking the scale. Take care over replacing them, it is easy to get the zero indication wrong. Check by holding the cluster in the orientation it will take up when back in the car.

You can view this image at full width (x 4) by downloading it.
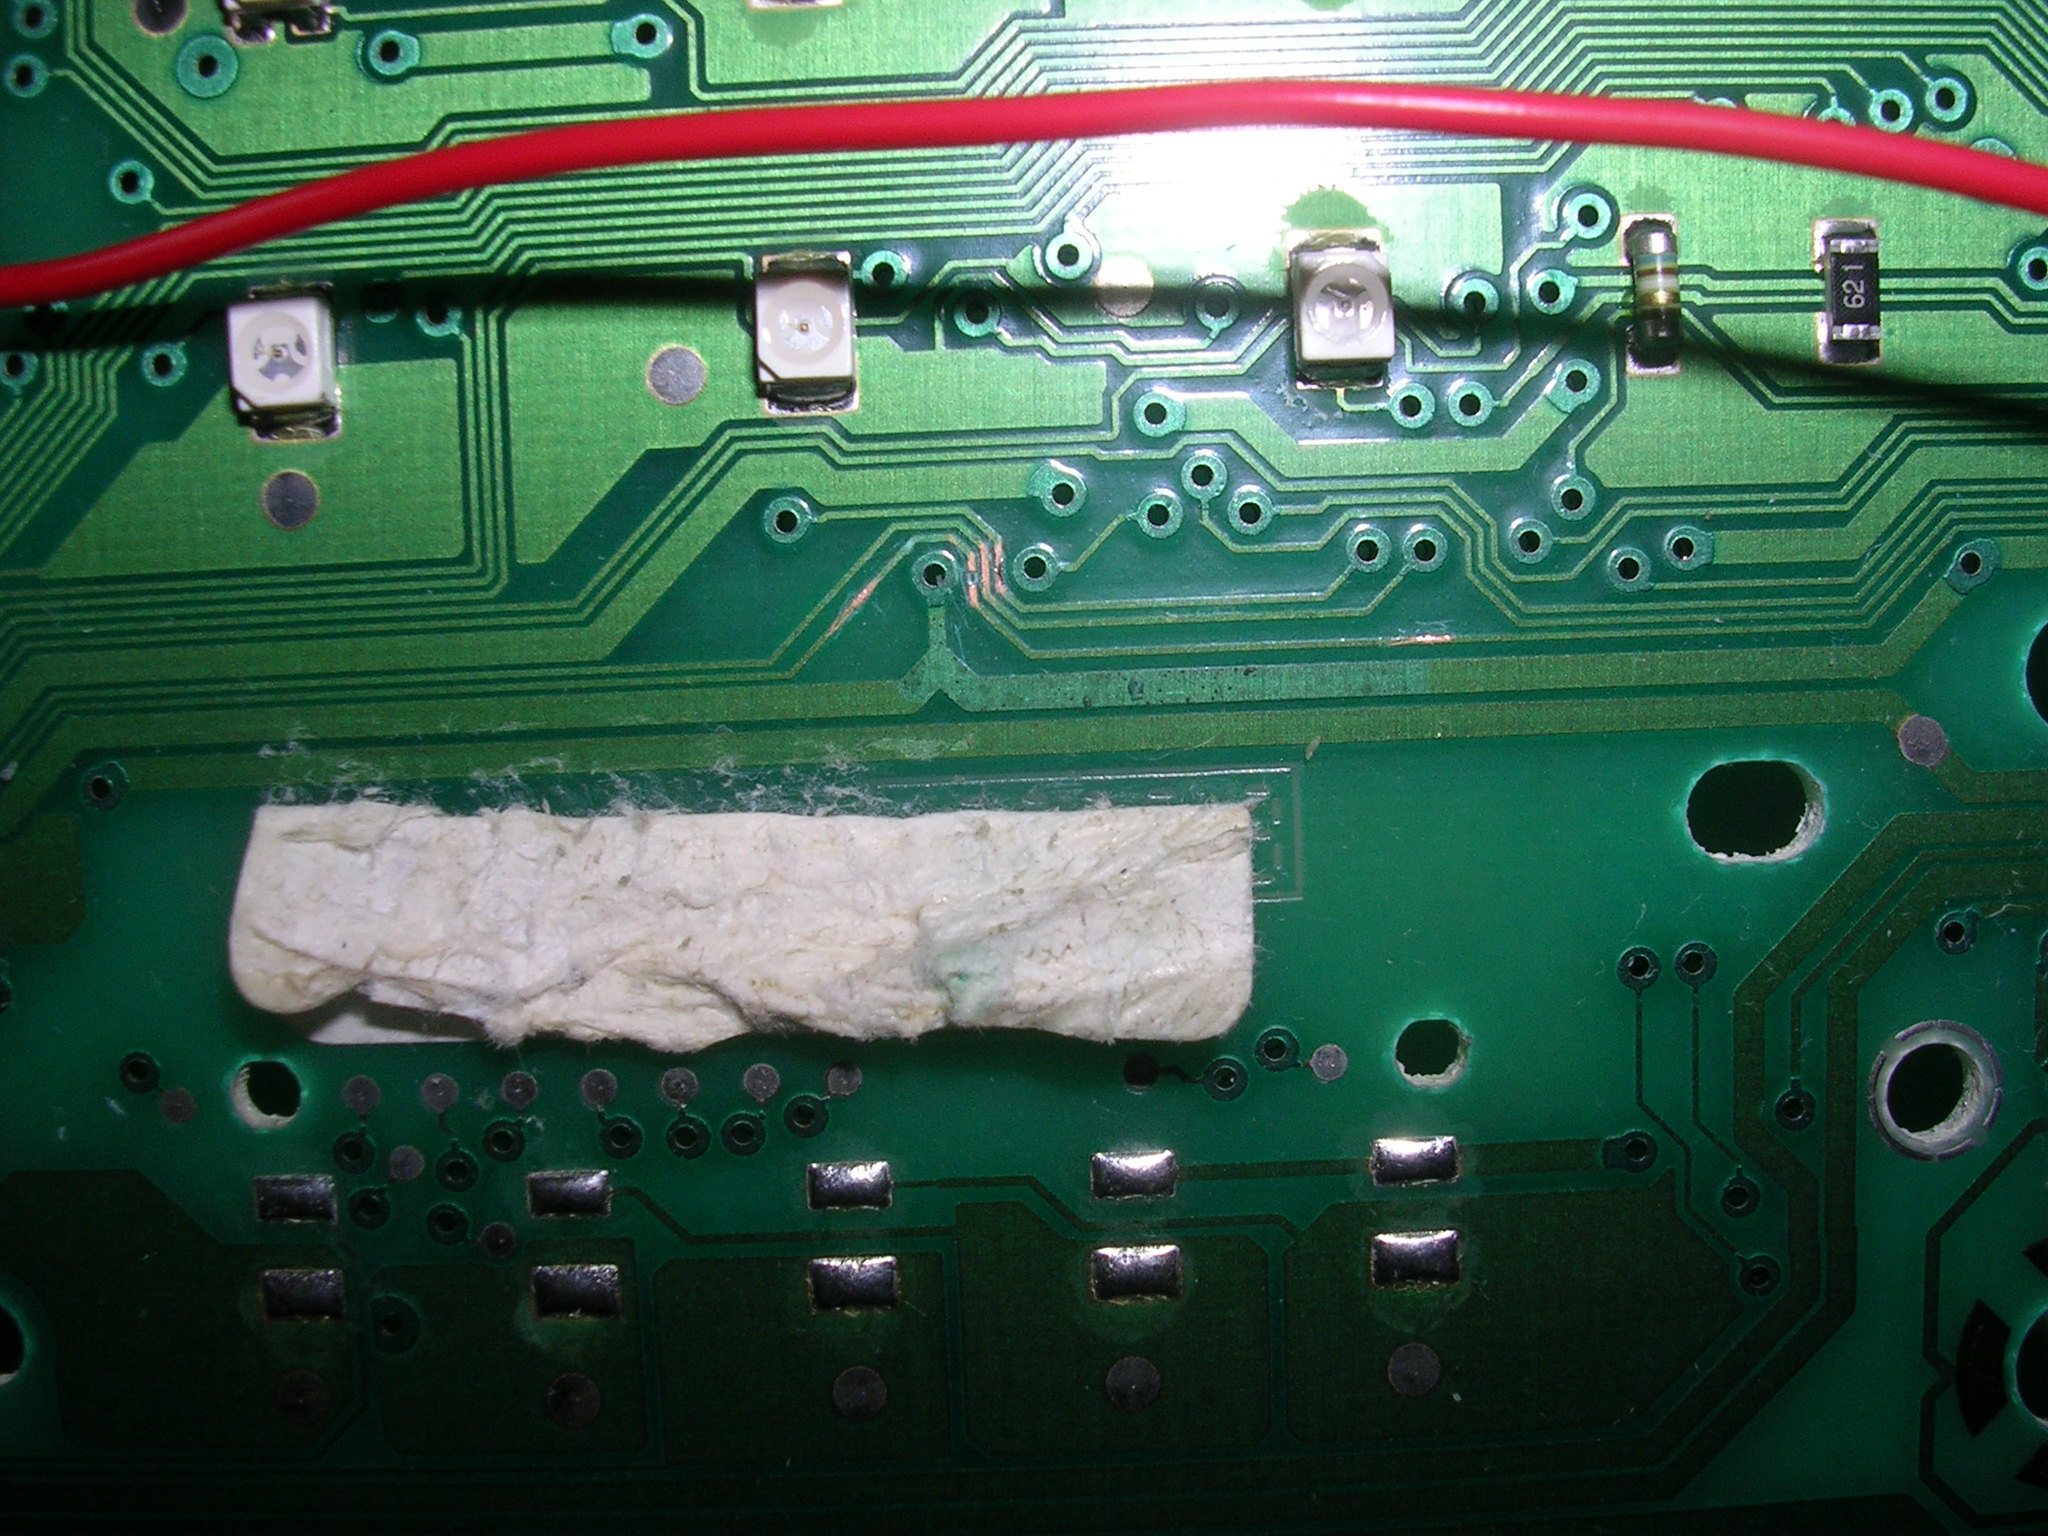
After a lot of probing with an analogue meter on the x1 ohms range (its powered by a single dry cell and will light the green LEDs) I found that the LEDs on each side were linked to each other, but not by a simple track for every connection. Eventually, after drawing a diagram of which LED connected to which, I discovered that a very long and fine track from LED 5, the only connection to one side of it, was open circuit. It is probably not a coincidence that the break was underneath a sticky paper label (rolled back to uncover the tracks). Rather than mess around trying to bridge the gap I bypassed the entire section with a wire from the LED to a resistor.
This fixed my specific problem. I do not have any record of the connection points for my red wire.
In the image you can see where I scraped the tracks clean to hunt down the break. (There are more places, out of shot.) You can also see my red wire link. There is plenty of room to lay it through. I finished the job by painting a little clear nail varnish over the places where I had exposed the copper. Condensation is a serious issue with early Fabias, but the board and solder looked good otherwise. Testing of the lighting LEDs can be done in the car, without the complete reassembly of the cluster.
These boards have a bad repution for producing all sorts of faults. Many are reportedly cured by resoldering (the connector to board joints in particular). There are companies specialising in fixing failed boards. I think that have probably avoided a bill for more than £200 by doing this repair myself.
While I was at it I had another attempt a curing the much hated Fabia creak. It can be produced when stationary by pulling the steering wheel in various directions. The noise comes the fascia fretting in its supporting lug, in the middle of the bulkhead.
I squirted a generous amount of teflon bicycle lubricant, through the aperture that held the instrument cluster, in the general direction of the lug. I also squirted a lot between the fascia and the bottom of the windscreen. At first I thought I was losing the battle, but after a few thumps, and heaving on the fascia, the creak stopped. Time will tell, it was still quiet after 125 miles and 24 hours!
500 mile up date. Its back, but not so loud. Perhaps there is more than one fretting lug. More research needed.
John Everingham. G4TRN, FTCLWebmaster.
email:- g4trn(at)saundrecs.co.uk
TOP of SITE